ZEN STUDIO
Zen Studio is the software that gives full control over your Zen hardware with multiple levels of configuration, as well as easy access to advanced scripts, and macros by way of a powerful and fully upgraded GPC script compiler, along with a huge range of pre-configured GamePacks with the latest mods for the latest games.
Zen Studio also has a comprehensive Mouse & Keyboard settings interface as well as various plugins for capturing inputs from your controller, and re-mapping buttons, analog sticks, and sensors without any scripting knowledge. This page will show you how to easily install Zen Studio, and guide you through the different Working Panels.

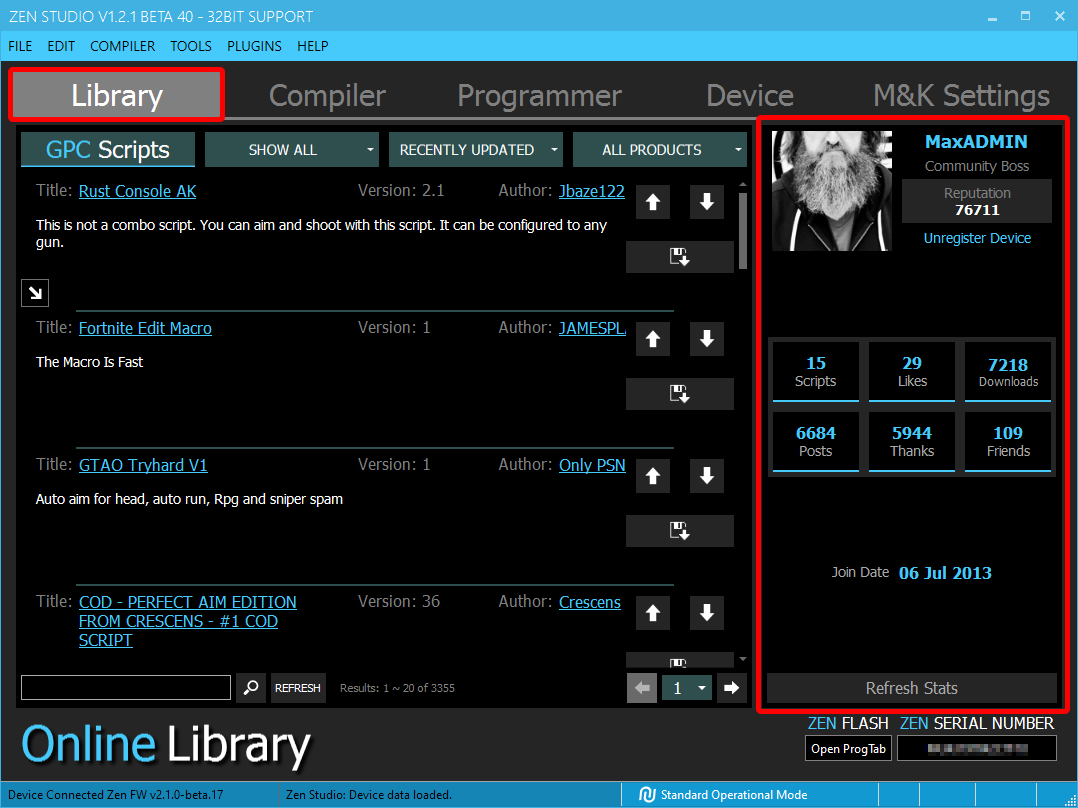
If successful, you will see your Community Account information display on the right side of the Library Panel 👍
The Cronus GPC Library includes thousands of free scripts exclusive only to registered Cronus Community Members, with special private access for Cronus Zen owners. Detailed instructions can be found here👉 Library

The Compiler is a fully loaded IDE, designed to edit & compile GPC source code files with full-text formatting, find/replace, and real-time syntax highlighting. Includes a full debugging output window. Detailed instructions can be found here👉 Compiler

Get easy access to all GamePacks, Library Scripts, Re-mapper Profiles, and GPC Files.
Detailed instructions can be found here👉 Programmer
If you see an error saying, "Unable to Download GamePacks", it means your ISP is blocking the Cloudflare DNS so you will need to use a VPN service. There are many free ones, we recommend ProtonVPN.

To access the instructions for each GamePack, highlight the pack you are interested in then click on the i icon next to the GamePack name (see image below).

View connected devices, enable PS Remote Play or PS4 Speciality, a 16bit compiler for older scripts, change multiple device options, and access to various maintenance tools including Reset Device, Factory Reset, Erase Memory Slots, and Device Monitor. Detailed instructions can be found here 👉 Device

Take your gaming with Cronus to the next level with our brand-new Mouse & Keyboard Translator Engine.
We found that many Zen users would often use a third-party MK device to get better mouse & keyboard performance, while still using Zen for MODS and scripts. As you can imagine, this didn't jive with our dev team, so they went back to the drawing board, redesigning the Cronus Zen Mouse and Keyboard engine from the ground up.
Over a year in development, and after hundreds and hundreds of Mouse & Keyboard support tickets and months of community feedback during the open beta, we're excited to reveal what we now believe is the world's most powerful Mouse/Keyboard/Controller/Script all-in-one translator device. Detailed instructions can be found here👉 M&K Settings

The rest of the Zen Studio guide is split into sections that explain every panel, button and feature in extra detail.